

Replacing the water pump on your Johnson outboard motor is essential for maintaining proper cooling and preventing corrosion․ This guide covers the process for various Johnson models‚ ensuring a smooth replacement experience․
1․1 Importance of Water Pump Maintenance
Proper water pump maintenance is crucial for preventing overheating and corrosion in your Johnson outboard motor․ Neglecting it can lead to costly repairs‚ engine damage‚ and reduced performance․ Regular inspection ensures optimal cooling‚ protecting vital components and extending the motor’s lifespan․
1․2 Overview of the Replacement Process
The replacement process involves draining the coolant‚ disconnecting the battery‚ and securing the motor․ Remove the lower unit and water pump housing‚ inspect for damage‚ and install the new pump․ Reassemble the motor‚ refill coolant‚ and test for leaks and proper water flow to ensure everything functions correctly․
Tools and Materials Needed
Essential tools include a socket set‚ screwdrivers‚ and pliers․ Materials required are a water pump repair kit‚ BRP Triple-Guard Marine Grease‚ and a gasket sealing compound for proper installation․
2․1 Essential Tools for the Job
The essential tools needed include a socket set for bolt removal‚ screwdrivers for disassembly‚ and pliers for handling small parts․ Additionally‚ a torque wrench ensures proper bolt tightening‚ while gloves and safety goggles provide protection during the process․
2․2 Recommended Lubricants and Sealants
Use BRP Triple-Guard Marine Grease or Mercury 2-4-C Marine Lubricant for lubrication․ Apply a gasket sealing compound to ensure leak-proof connections․ These products protect against corrosion and provide a durable seal‚ essential for maintaining the integrity of the water pump and outboard motor․
2․3 Water Pump Repair Kit Components
A typical water pump repair kit includes an impeller‚ gasket set‚ O-rings‚ and housing plate․ Ensure the kit is compatible with your Johnson outboard model for a proper fit․ These components are essential for restoring optimal water flow and preventing leaks during operation․
Preparing the Outboard Motor
Drain the coolant system‚ disconnect the battery‚ and secure the motor in forward gear to ensure safe and effective water pump replacement․
3․1 Draining the Coolant System
Begin by draining the coolant to prevent spillage during disassembly․ Locate the drain plug‚ position a pan to catch the fluid‚ and carefully remove the plug․ Allow the system to drain completely before proceeding to disconnect or remove any components․
3․2 Disconnecting the Battery
Always disconnect the battery to ensure safety and prevent accidental engine start-up․ Begin by loosening the bolt on the negative terminal (black) and pull the connector off․ Repeat for the positive terminal (red)․ Use a wrench if necessary․ Consult your owner’s manual for specific instructions on your Johnson outboard model․
3․4 Securing the Motor in Forward Gear
Shift the motor into forward gear to prevent movement during replacement․ Use the gear shift on the motor or a locking tool to secure it․ This ensures stability and alignment when reassembling the lower unit and water pump housing later․ Always refer to your Johnson outboard manual for specific gear locking instructions․
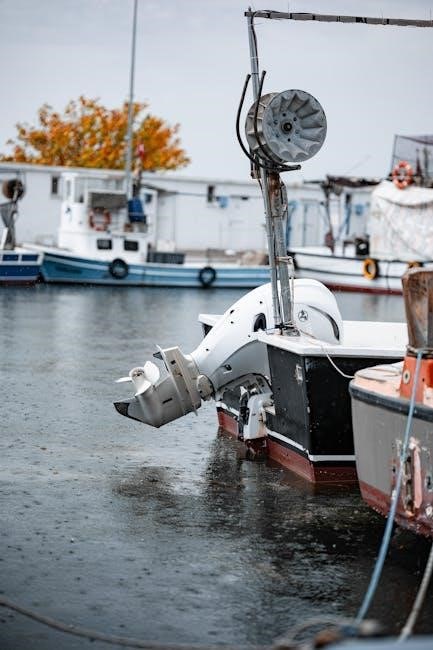
Removing the Lower Unit and Water Pump Housing
Remove the bolts securing the lower unit and water pump housing․ Carefully lift the lower unit to access the water pump․ Detach the housing for replacement․
4․1 Taking Out the Bolts
Start by removing the bolts that secure the lower unit and water pump housing․ Use a socket wrench to ensure a proper fit․ Gently loosen and remove each bolt‚ taking care not to strip the threads․ Place the bolts in a safe location to avoid losing them during the process․
4․2 Carefully Lifting the Lower Unit
After removing the bolts‚ carefully lift the lower unit using a hoist or jack stands for stability․ Ensure the unit is securely supported to prevent accidental dropping․ This step requires precision to avoid damaging the motor or surrounding components․ Always prioritize safety when handling heavy machinery parts․
4․3 Detaching the Water Pump Housing
Once the lower unit is lifted‚ remove the slotted screws securing the water pump housing․ Use a tool to hold the key in place while sliding the housing off․ Align the housing carefully to avoid damaging the impeller or surrounding components․ Ensure proper alignment before proceeding to the inspection phase․
Inspecting and Installing the New Water Pump
Inspect the new water pump for damage and ensure all components are included in the repair kit․ Align the impeller correctly‚ indexing the key for proper fitment before securing it in place․
5․1 Checking for Damage
Examine the new water pump for any signs of damage or wear․ Ensure the impeller blades are intact and the housing is free of cracks․ Verify all gaskets and O-rings are included and undamaged to guarantee a proper seal during installation․
5․2 Aligning and Securing the New Pump
Align the new water pump with the key or tab on the housing to ensure proper fitment․ Apply a thin layer of marine lubricant to the O-ring for a watertight seal․ Gently slide the pump into place‚ ensuring it seats evenly․ Secure it with the provided bolts‚ tightening them in a star pattern to avoid misalignment․
5․3 Tightening the Bolts Evenly
Tighten the bolts using a torque wrench at 30-40 ft-lbs․ Work in a star pattern to ensure even pressure․ Avoid over-tightening to prevent housing damage․ Proper torque ensures a leak-free seal and optimal pump performance․ Double-check torque specs for your specific Johnson model․
Reassembling the Outboard Motor
Reattach the lower unit and water pump housing‚ ensuring proper alignment․ Refill the coolant system and reconnect the battery․ Tighten all bolts evenly and test the motor․
6․1 Reattaching the Lower Unit
Align the lower unit with the motor‚ ensuring proper fitment․ Reinsert the bolts‚ tightening them in a star pattern to avoid warping․ Use a torque wrench for accuracy․ Double-check alignment and ensure all connections are secure before proceeding․ Consult your manual for specific torque specifications to guarantee a safe and proper reattachment․
6․2 Refilling the Coolant System
After reattaching the lower unit‚ refill the coolant system with a 50/50 mix of coolant and water․ Pour the mixture into the reservoir until it reaches the recommended level․ Replace the coolant cap securely․ Start the motor and let it run briefly to circulate the coolant‚ ensuring there are no leaks․
6․3 Reconnecting the Battery
Reconnect the positive terminal first‚ followed by the negative terminal‚ ensuring all connections are secure․ Double-check that the battery terminals are tight and free from corrosion․ Once reconnected‚ start the engine to verify proper operation and coolant flow through the system․

Testing the Water Pump
Run the engine in neutral‚ observe water flow from the pump‚ and check for leaks․ Ensure proper water circulation to confirm the pump is functioning correctly․
7․1 Running the Motor in Neutral
Start the engine and shift into neutral gear․ Allow it to run for a few minutes to ensure smooth operation and proper water flow from the pump‚ verifying the impeller’s function without load stress․ This step ensures the pump operates correctly before real-world use․
7․2 Checking for Leaks
After starting the engine‚ inspect the water pump housing and connections for any signs of leaks․ Run the motor in neutral and observe the water flow․ Ensure all bolts and seals are tight‚ and verify that the impeller is functioning properly without leakage․
7․3 Ensuring Proper Water Flow
Start the engine and run it in neutral gear to observe the water flow․ Ensure a steady‚ consistent stream is present․ If the flow is weak or absent‚ inspect the impeller for damage or obstructions․ Adjust the throttle to higher RPMs to confirm consistent water output and proper pump function․

Tips for Extending Water Pump Life
Regular inspections‚ using recommended lubricants‚ and proper storage can extend water pump life․ Ensure all components are clean and free from damage to maintain optimal performance․
8․1 Regular Maintenance Schedule
Establish a routine maintenance schedule to ensure the water pump operates efficiently․ Inspect the impeller every 50 hours of operation and replace it annually or as needed․ Clean the housing and check for wear or damage․ Lubricate moving parts with BRP Triple-Guard Marine Grease or Mercury 2-4-C Marine Lubricant regularly․
8․2 Monitoring Operating Conditions
Monitor the outboard motor’s operating conditions to prevent overheating and ensure proper water flow․ Watch for signs of wear or damage to the impeller and housing․ Regularly inspect the water pump’s performance during operation‚ especially at low idle speeds‚ to ensure it circulates water effectively and maintains cooling efficiency for optimal engine function․
8․3 Storing the Motor Properly
Store the Johnson outboard motor in a dry‚ well-ventilated area to prevent rust and corrosion․ Drain the coolant system to avoid freezing damage․ Apply a layer of marine grease to moving parts for protection․ Cover the motor to shield it from dust and direct sunlight‚ ensuring the water pump remains in good condition during storage․
Replacing the water pump on your Johnson outboard motor is a manageable task that ensures proper cooling and prevents costly damage․ Follow the steps carefully to guarantee reliability and longevity․
9․1 Summary of the Replacement Process
The replacement process involves draining the coolant‚ disconnecting the battery‚ securing the motor‚ removing the lower unit‚ inspecting‚ and installing the new pump․ Reassembly includes reattaching the lower unit‚ refilling coolant‚ and reconnecting the battery․ Testing ensures proper water flow and function‚ completing the replacement successfully․
9․2 Final Checklist for Success
Ensure all bolts are tightened evenly‚ the coolant system is refilled‚ and the battery is reconnected․ Test the water pump by running the motor in neutral‚ checking for leaks‚ and verifying proper water flow․ Store the motor correctly to extend the pump’s lifespan and maintain optimal performance․